

For Goh Guoxin, composite photography is an imaginative play of photos, using elements from multiple photos to form a single image. He often finds the results to be amazing as they help the photo manipulator tell incredible stories.


For Goh Guoxin, composite photography is an imaginative play of photos, using elements from multiple photos to form a single image. He often finds the results to be amazing as they help the photo manipulator tell incredible stories.
BASIC WORKFLOW FOR COMPOSITE PHOTOGRAPHY
Before we start, Guoxin says it’s crucial to take note of some points. Identify and decide on the source and direction of the light. Then for easy editing, choose photos with similar lighting and angle (based on the angle of the background) so the end result is more realistic.
PART I : Masking your objects
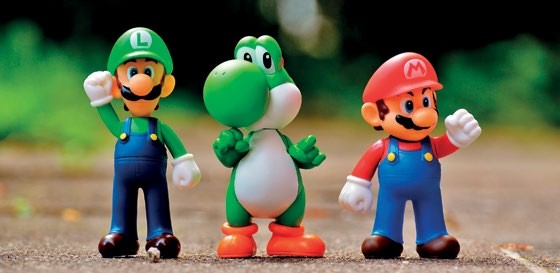
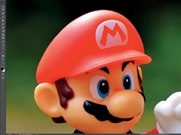
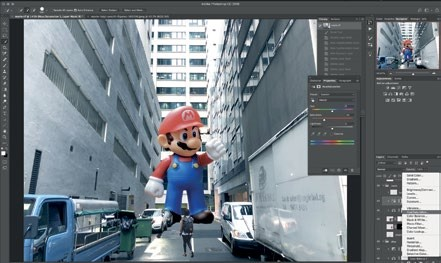
Open the image of Mario in Photoshop.
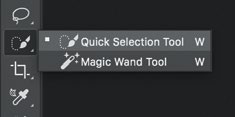
1 First, Guoxin selects and mask out
the Mario using the “Quick Selection
Tool” (shortcut key “W”).
2 Normally, Photoshop does a pretty
neat job in selecting the subject, but
this depends on the quality of the
image, and on how much contrast
there is between the subject and
the background. Thus, Guoxin
recommends zooming in to the edges
to manually refine the selection.

3 Once satisfied, click on the “Add
Layer Mask” to create the mask based
on your selection.
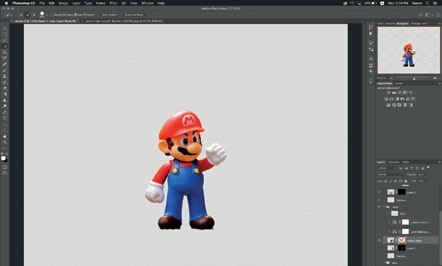
4 Mario is nicely masked out.
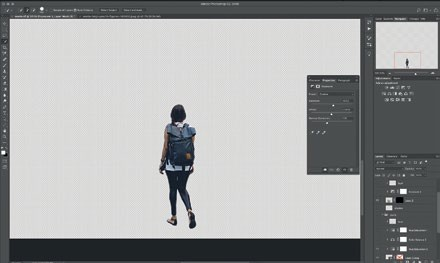
5 Repeat the steps to mask out the
lady, and then save it. The result is
shown here.
Save your masked objects as a
Photoshop file (PSD).
PART II: Preparing the background
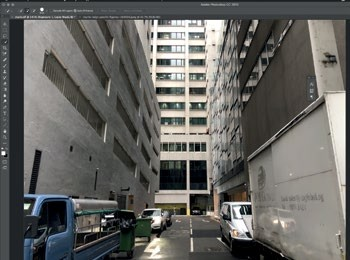
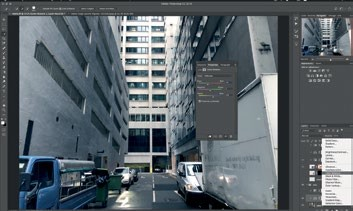
6 Here, Guoxin tweaks the color
of the background with a “Color
Balance” adjustment layer to color
grade it a little, giving the image a
more cinematic feel.
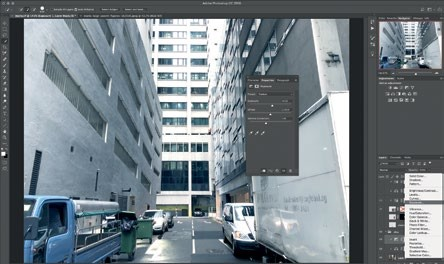
7 Next, he also tweaks it to look
brighter with an “Exposure”
adjustment layer.
PART III: Importing the masked objects
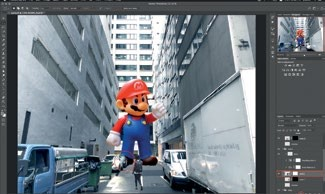
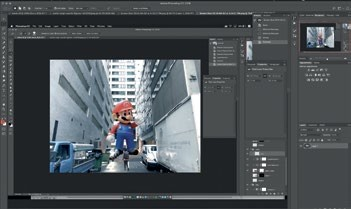
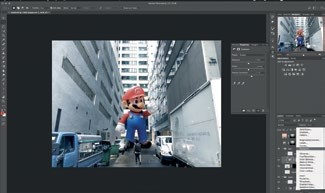
After adjusting the background image, Guoxin imports both the edited Mario and Lady images in by clicking and dragging them into it.
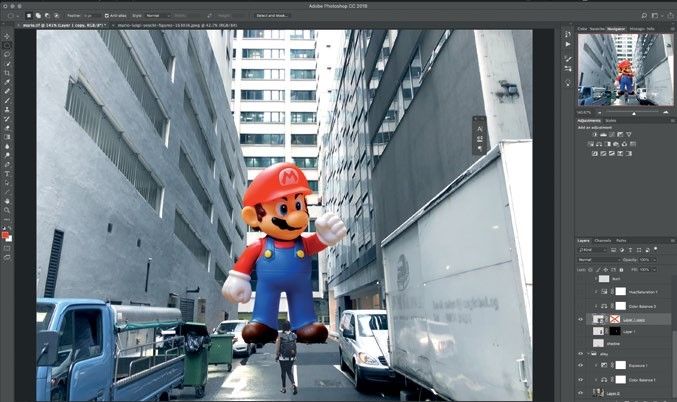
8 Then, he resizes the objects to
achieve the results as shown in Fig. 8.
The order of the layers should be as
follows. Lady > Mario > Background.
Note: The imported images will be
converted to “Smart Objects” by
default, but this format is a good
way to preserve the image quality
especially when you scale it.
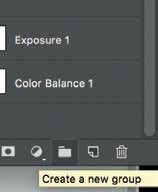
9 For easy management, group the
Mario and the Lady layers.
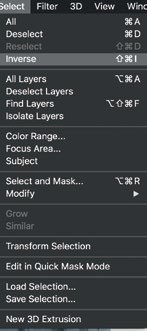
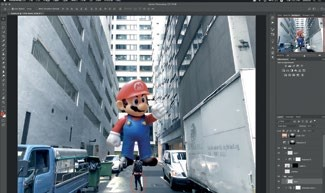
<b>Step 4 –Editing Mario</b> 10 As you can see, Mario’s right leg appears to overlap the cars. To fix that, Guoxin first hides the entire Mario layer to reveal the background. Then, he picks the background layer and uses the Quick Selection tool again to select the cars. By clicking Select > Inverse, selecting the Mario layer, and clicking on Create Vector Mask, Guoxin creates a mask on Mario to hide the portion of his leg that coveres the cars.
11 His next move is to select the Mario
layer and create a new Color Balance
adjustment layer. For this specific
project, the settings in the Midtones
are Cyan/Red -35, Magenta/Green 0,
and Yellow/Blue +21.
12 Make sure the “Clip to layer”
option is enabled so that it only affects
the Mario layer.
13 Next, Guoxin selects the newly
added Color Balance layer and then
adds a Hue/Saturation layer to
desaturate the colors by setting the
Saturation to -30. Again, be sure the
“Clip to layer” option is enabled so
that it only affects the Mario layer.
By now the Mario should look it
blends well with the background.

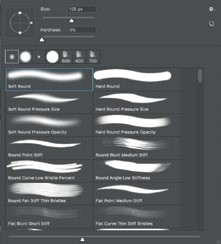
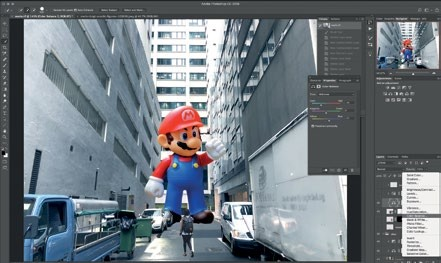
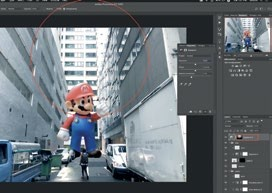
14 Guoxin then creates a new blank layer on top of the Color Balance and Hue/Saturation layers for image “Burning”. Make sure to clip this layer to the Hue/Saturation layer as you only want the effects on the Mario. Then switch to Brush mode (shortcut key “B”), and pick a “Soft Round” brush (Size 125px, Opacity 22, Hardness 0) and choose black to brush the some areas to give it some shadow for realistic lighting.
15 For this image, Guoxin paints the
legs and shoes.

16 Now, create a new blank layer
just below the Mario layer. This will
be the shadows layer. As there is no
harsh lighting, the shadow cast on the
ground should be diffused. With the
same brush settings in the previous
step, Guoxin brushes the shadows on
the road and on the cars near Mario’s
right leg.
17 Lastly, he duplicates the Mario layer and flips it horizontally. Move this copy of Mario towards the right of the image and mask out a portion of his fist. Next, lower the opacity to create a reflection on the reflective panels of the wall. And you’re done with Mario.
PART V: Editing the lady
18 Create an exposure adjustment layer to darken the lady so that the lighting looks right overall by clicking the adjustment layer button at the bottom of the layers panel. For this, Guoxin set Gamma Correction to 0.75, and make sure to clip the adjustment layer to just the layer with the lady.
19 Next, create a blank layer just on
top of the Exposure layer and clip it to
the exposure layer. Then brush over
the legs of the lady with the same
brush settings as before
20 Now, create a blank layer just
below the Lady layer for her shadows.
Again with the same brush settings,
paint her shadows on the road.
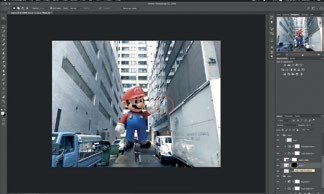
PART VI: Blending in everything
21 Guoxin creates an Exposure adjustment layer and places
it at the very top, then applies a radial gradient to the mask,
simulating a consistent glare on all the layers. The setting
for this is Gamma Correction at 1.45.
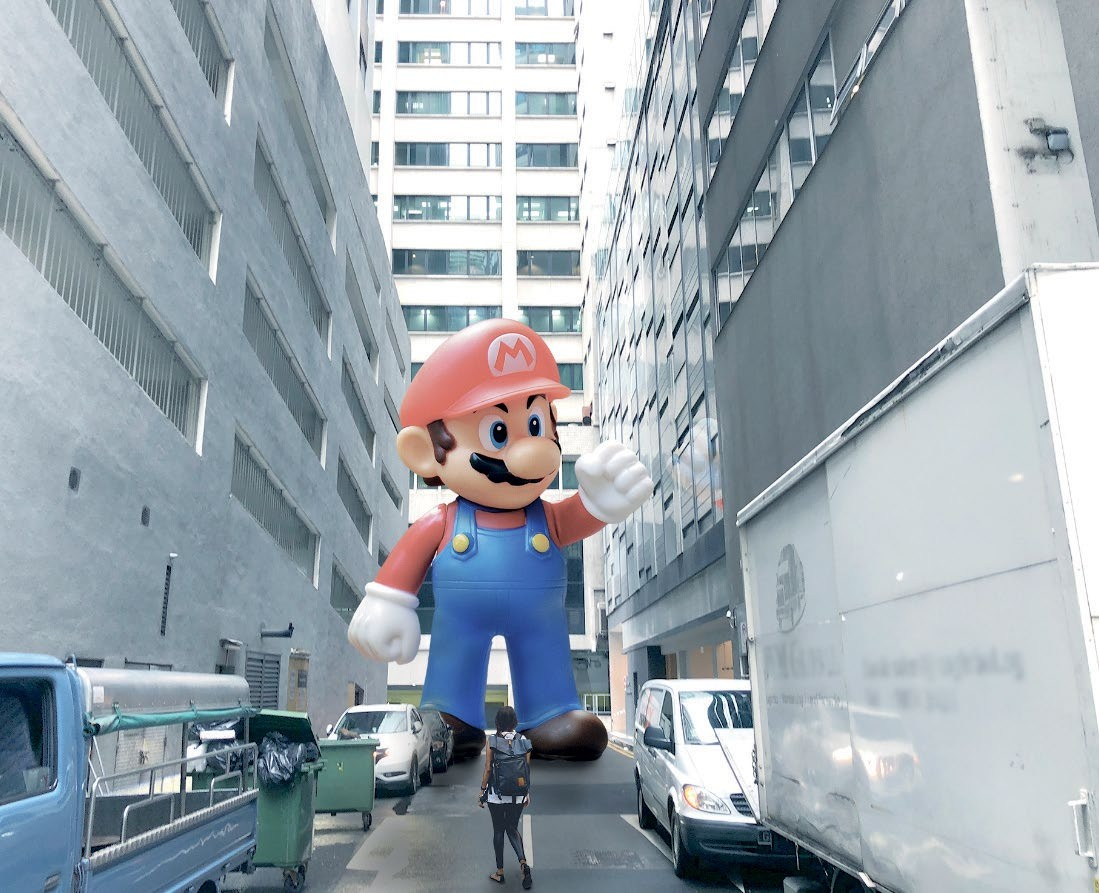
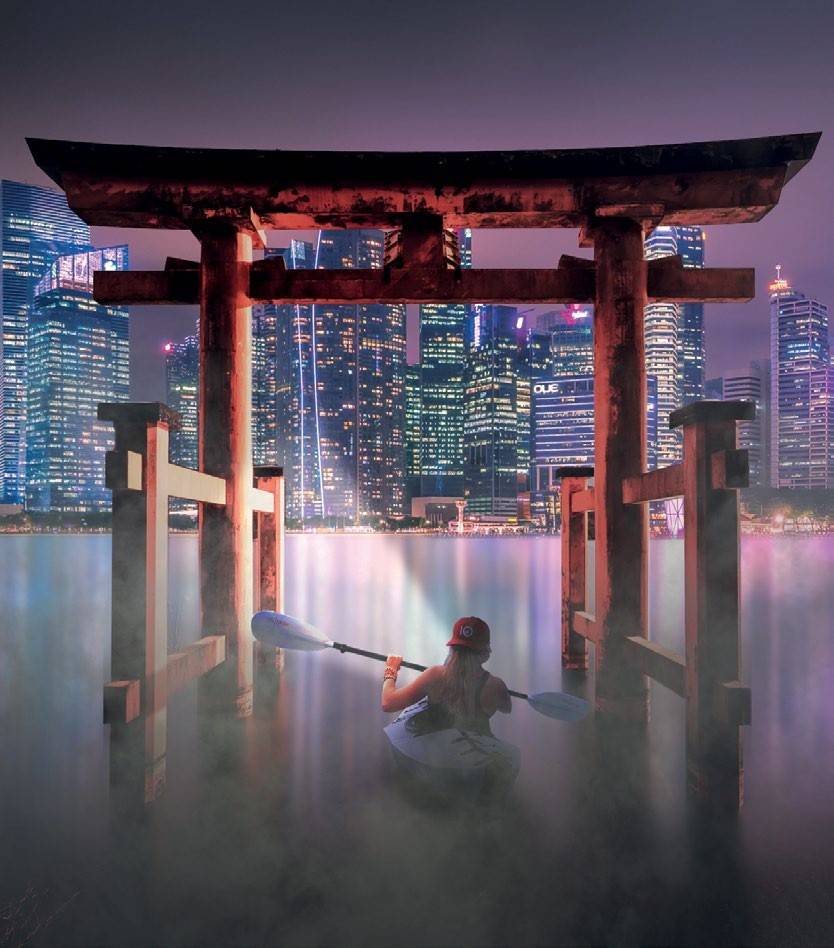
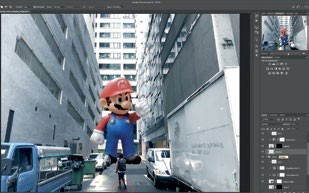
22 And voilà, the finished composite.
Images by Goh Guoxin (@9oh9x), Founder, @Kilogrammerz Edited by Marcus Wong
previous article
next article


