With Intel’s sixth-generation Skylake processors, overclocking is no longer the prerogative of unlocked desktop CPUs. The Intel Core i7-6820HK processor is the first overclockable mobile processor from Intel. For the adventurous, this means free performance with just a handful of tweaks using the right software utility.


With Intel’s sixth-generation Skylake processors, overclocking is no longer the prerogative of unlocked desktop CPUs. The Intel Core i7-6820HK processor is the first overclockable mobile processor from Intel. For the adventurous, this means free performance with just a handful of tweaks using the right software utility.
With a maximum Turbo frequency of 3.6GHz, the new chip can be overclocked to rival even the desktop Core i7-6700K processor. But seeing as overclocking headroom is heavily dependent on maintaining chilly temperatures, manufacturers have considerable freedom to potentially unlock more performance by implementing more powerful cooling mechanisms.
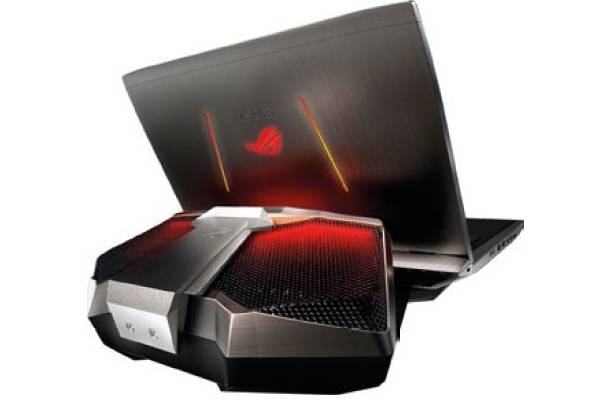
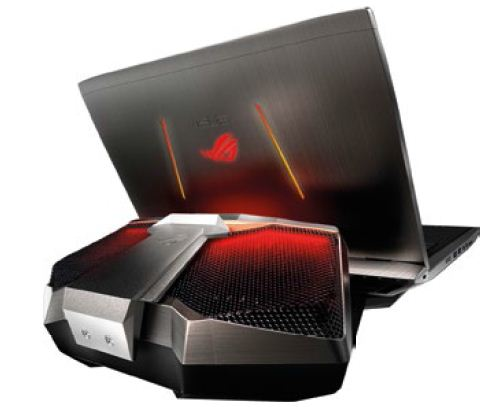
That brings us to the ASUS ROG GX700, one of the first laptops to include the new processor, and – wait for it – liquid-cooling capabilities. On top of that, the GX700 is equipped with an NVIDIA GeForce GTX 980 desktop graphics card, shrunk down to fit in a notebook.
As it turns out, overclocking on the GX700 is remarkably straightforward because plugging the notebook into its dock automatically boosts the CPU multiplier to 40, which allows it to ramp up to 4.0GHz – a huge boost over its base frequency of 2.7GHz.
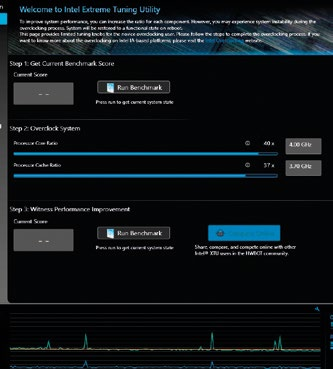
Nevertheless, because not all laptops that will eventually feature the new processor will come with their own overclocking docks or apps, we’ll show you how to overclock the chip using Intel’s Extreme Tuning Utility (XTU). The utility can be downloaded from Intel’s website. However, do note that you probably won’t be able to achieve as high an overclock on other laptops without special features like the GX700’s water-cooling.
Disclaimer: Just like overclocking desktop CPUs, overclocking your notebook CPU is performed at your own risk. If you’re not comfortable with the utility or potentially frying your notebook and voiding your warranty, do NOT continue.
1. INCREASE PROCESSOR CORE RATIO
Intel XTU provides varying levels of control over your overclock, so you can quickly achieve a light boost, or tinker around if you’re feeling adventurous. The Basic Tuning panel is the fastest and easiest way to overclock the CPU. Your primary concern is the Processor Core Ratio option, which corresponds to the 2.7GHz default base frequency. You’ll want to adjust the slider in gradual increments so you can isolate the stable setting for your chip.
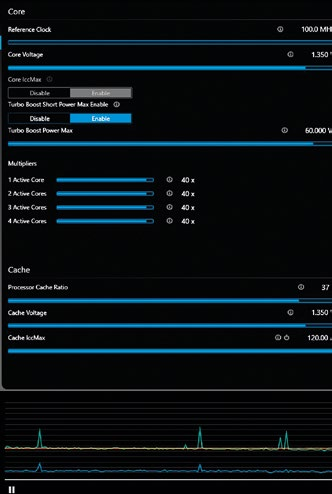
2. ADJUST THE CPU BASE CLOCK
The Advanced Tuning tab offers you control over additional parameters, most notably the CPU base clock, or reference clock as it is referred to in the utility. The reference clock is tied to the CPU multiplier (Processor Core Ratio in Basic Tuning), and the final clock speed is achieved by multiplying the reference clock by the multiplier. For instance, if the reference clock is kept at the default 100MHz, setting the multiplier at 40 would mean a final clock of 4.0GHz. One advantage of changing the reference clock is that it allows you to increase the overall clock speed in finer increments. If your system was failing the stability tests at 3.9GHz but was doing fine at 3.8GHz, you’d be stuck at the latter speed, without knowing if you could actually reach a higher value between the two speeds.
By adding reference clock tweaking to your overclocking tool belt, you can now begin to test the actual limits of your CPU. It’s then a matter of some simple math to find the right value combinations to achieve the clock speed you want to test out.
However, because the reference clock is tied to other values throughout the system like memory speeds, increasing it could possibly introduce other instabilities that would make it difficult to single out the cause of crashes. As a result, we’d recommend being extremely conservative in your base clock tweaks – no more than a few MHz above default, especially if your notebook isn’t a water-cooled beast like the GX700.
3. INCREASE THE VOLTAGE
You may also need to increase the default voltages while overclocking. Sometimes a voltage boost is what is needed to make an overclock stable, but you’ll want to do this in tiny 0.05V increments. Playing around with voltages is always risky, and we wouldn’t exceed an upper limit of 1.35V.
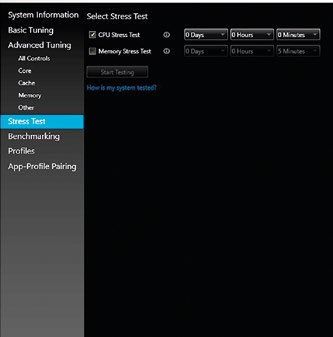
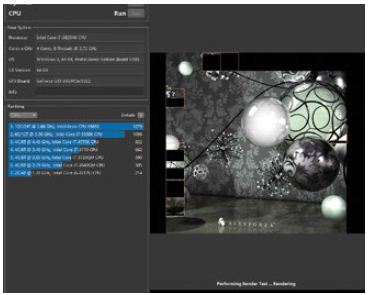
4. STRESS TEST THE CPU
We use Cinebench R15 as a quick way to test the stability of an overclock. It stresses all the CPU cores, so if your overclock isn’t stable, your notebook will most likely freeze or restart. Intel XTU also comes with a built-in stress test that works better for assessing long-term stability. Just check the box for the CPU Stress Test and select the duration for which you want to run the test (the longest possible is a whopping 30 days). If you think you’ve hit a stable value, you may want to set it to run for an hour for starters.