

Panorama images can look spectacular in the right situation: To capture entire vistas, or to record high-resolution images. Paul Burnett, Principal APAC Evangelist, Adobe Systems, shows you how.


Panorama images can look spectacular in the right situation: To capture entire vistas, or to record high-resolution images. Paul Burnett, Principal APAC Evangelist, Adobe Systems, shows you how.
Creating a stitched panorama is easy; you can do it in either Adobe Lightroom CC or Adobe Photoshop CC with just a few clicks.
CAPTURING THE IMAGES
You can capture the images for a panorama simply by hand-holding the camera – no tripod needed. The software is clever enough to work out where the images join. That said, there are a few helpful tricks. If you’re doing a horizontal panorama, hold the camera in portrait mode to get the most height out of your photos; the multiple images will take care of the width. The opposite is true if you are doing a vertical panorama. Begin at one end, and snap the shots slowly, moving across the scene. You should leave at least 2030% overlap between your shots and try to move the camera along a horizontal line (you can use the horizon as a guide). Take as many shots as you need to cover the scene, as you can always crop later.
STITCHING IN ADOBE LIGHTROOM
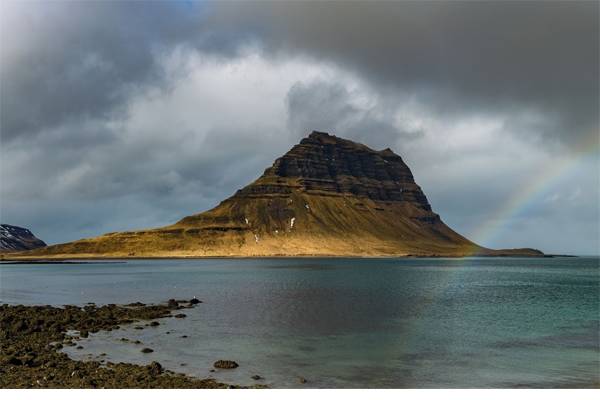
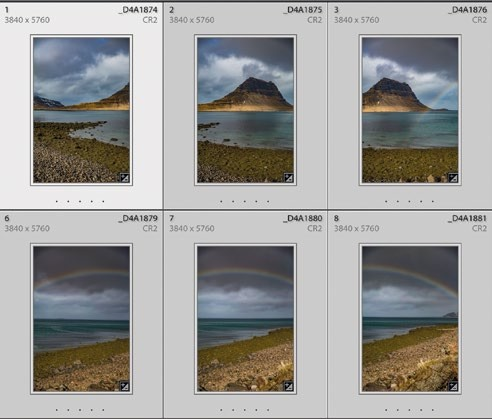
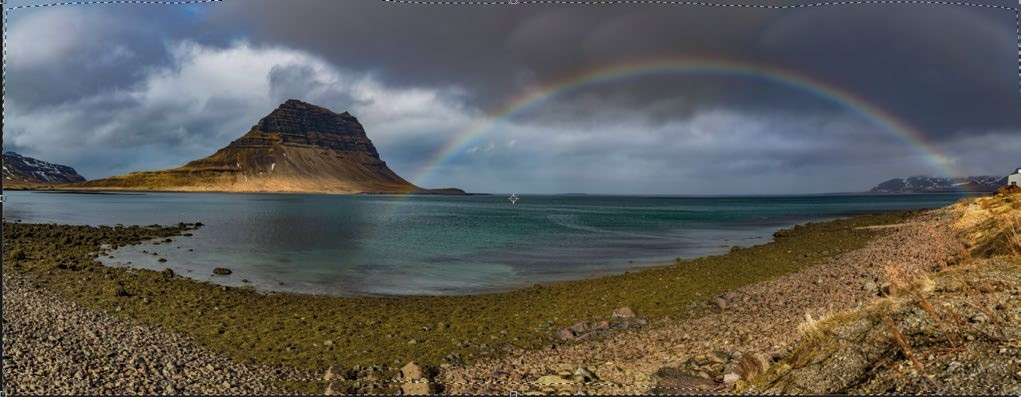
Let’s start in Adobe Lightroom. Import the images and select them all in the Library. In this example, I was lucky enough to be in Iceland a few months ago, visiting Kirkjufell Mountain. I took 10 shots hand-held to capture the scene, and imported them into Lightroom.
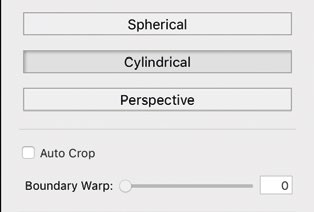
Here’s what you do next: First, select Photo > Photomerge > Panorama to access the Panorama dialog. Here, you’re presented with options that help Lightroom know what projection you want to use. Depending on how you took the shots and how close the content was, play around with these to find the best fit. I chose Cylindrical. Lightroom then does a rough stitch of the images so you can see how it will look.

Notice that there are some gaps around the edges. This is because of two things – Lightroom doing a lens correction to flatten the images, and because there were slight movements in the camera as I panned around. Now I can either choose to click the Auto Crop button and lose the edges, or I can use the new Boundary Warp slider to have Lightroom stretch the edge content out to fill the area.
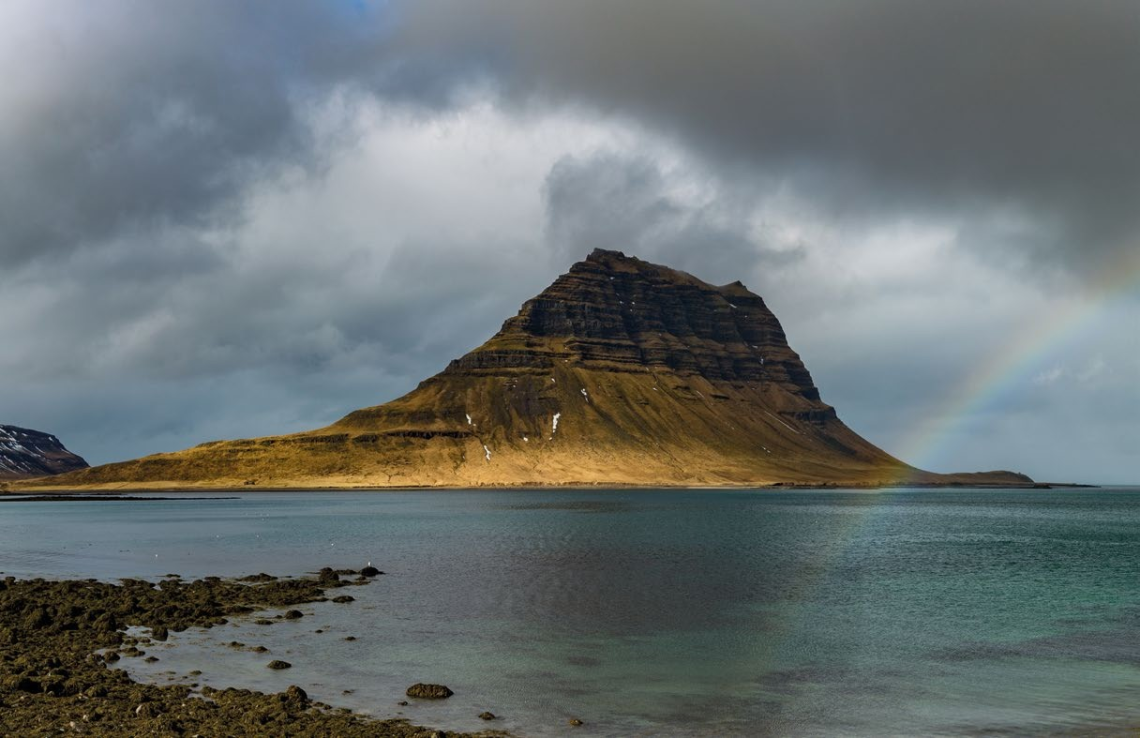
I chose to stretch the image, and then clicked Merge to have Lightroom render my panorama.
STITCHING IN ADOBE PHOTOSHOP CC
In Photoshop, some of the steps are similar. Instead of opening the images first, you choose File > Automate > Photomerge, then select the images and the settings that you want to use. This time, there are a few extra settings that I can apply.
I obviously want the images blended together, and Photoshop will build these as separate layers with masks if I check Blend Images Together.
Sometimes your lens will create a slight vignette near the corners of each image, but you can get Photoshop to remove these so they stitch well, by checking Vignette Removal.
Depending on the lens you used, the original images may also need Geometric Distortion Correction enabled, especially if they were shot with a fisheye.
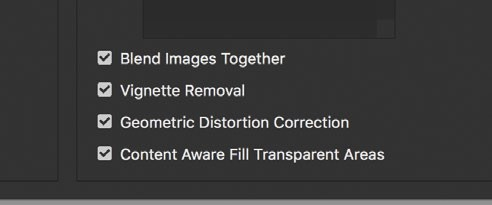
Lastly, you can get Photoshop to fill those empty edges by checking Content Aware Fill Transparent Areas. Unlike Lightroom, Photoshop doesn’t stretch the content from the edge – it actually intelligently creates the missing pixels using its Content Aware technology. You can see this in the following screenshot – Photoshop created the area outside the marching ants.
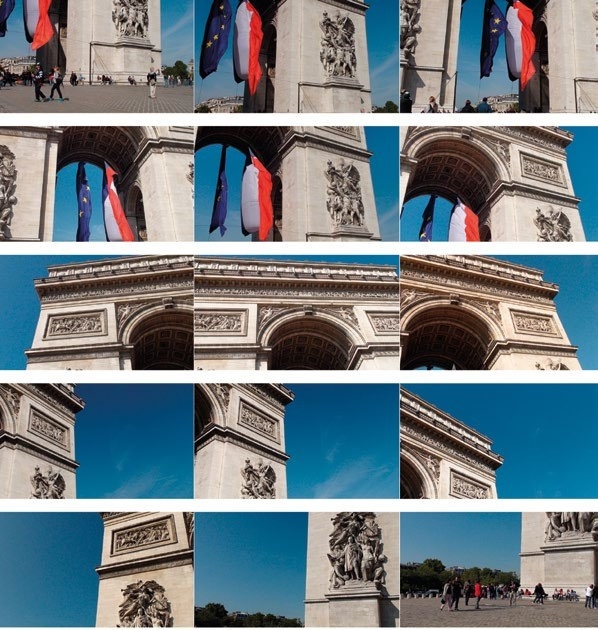
HOW TO GET A HIGH-RESOLUTION PHOTO USING YOUR PHONE
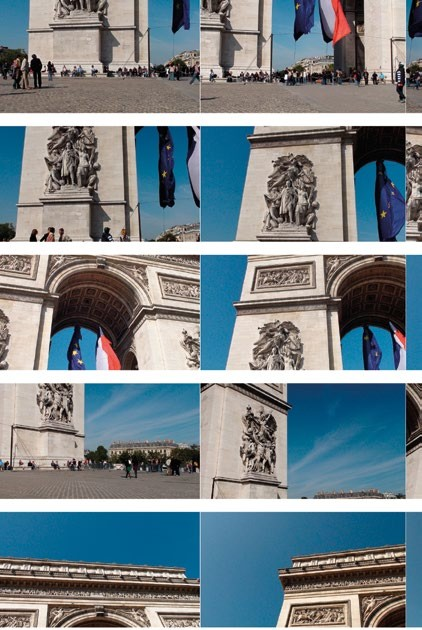
A few years ago I was at the Arc de Triomphe in Paris and I didn’t have my DSLR with me. I wanted a nice highresolution image but all I had was my phone. So what I did was take a heap of pictures – 25 in total. I snapped them in 5 rows and 5 columns but didn’t take too much care to get it perfect. I overlapped both the rows and the columns.
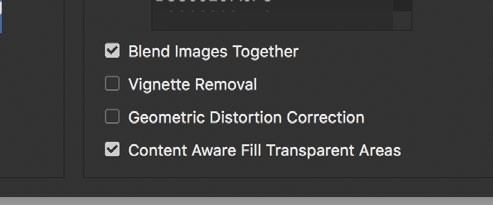
Back in Photoshop, I chose File > Automate > Photomerge, and pointed it to the 25 images. This time I selected some different options.
My images from the phone didn’t have a vignette so I left the Vignette Removal option unchecked. Also there was no real lens distortion in the images so I unchecked Geometric Distortion Correction. I asked Photoshop to fill the transparent edges, crossed my fingers, and clicked OK.
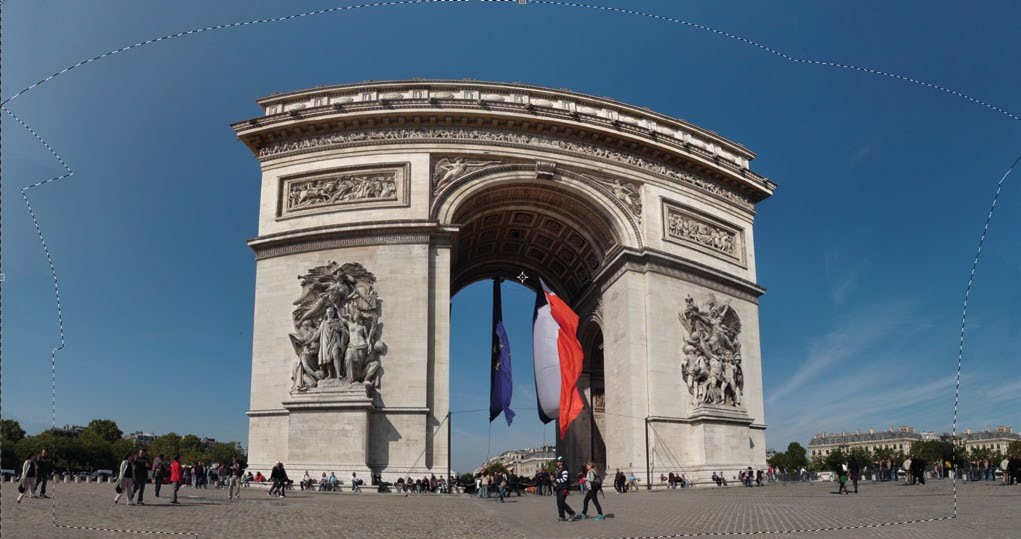
As you can see, Photoshop did an amazing job of stitching all 25 images together. It did a great job of creating a lot of extra sky and concrete in the foreground,however, it also repeated some of the buildings, trees and people in the background at the edges.
I’m not worried about that as I can crop that area and still end up with a great image. Because this image is the combination of 25 stitched images, it’s a very high resolution photo. If you want to get a photo that has higher resolution than your camera, this is a great way to do it.


