Adobe Photoshop Fix is a new, free mobile application for phones and tablets that currently runs on iOS (expect it soon on Android), but has powerful features from the desktop version of Adobe Photoshop that are designed for editing and retouching your photos. We’ve got Paul Burnett, Principal APAC Evangelist, Adobe Systems with us again this month to take us through its main features.


Adobe Photoshop Fix is a new, free mobile application for phones and tablets that currently runs on iOS (expect it soon on Android), but has powerful features from the desktop version of Adobe Photoshop that are designed for editing and retouching your photos.
RESTORING OLD PHOTOS WITH PAUL BURNETT
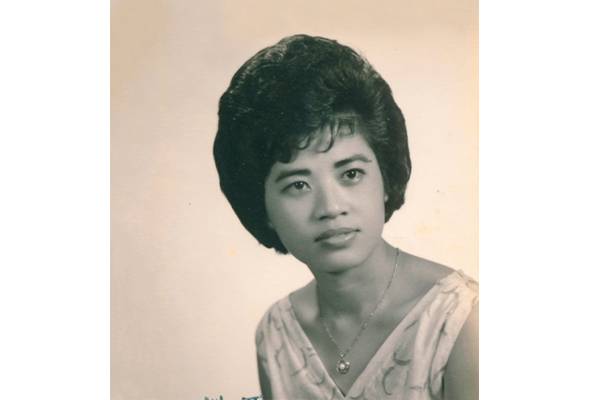
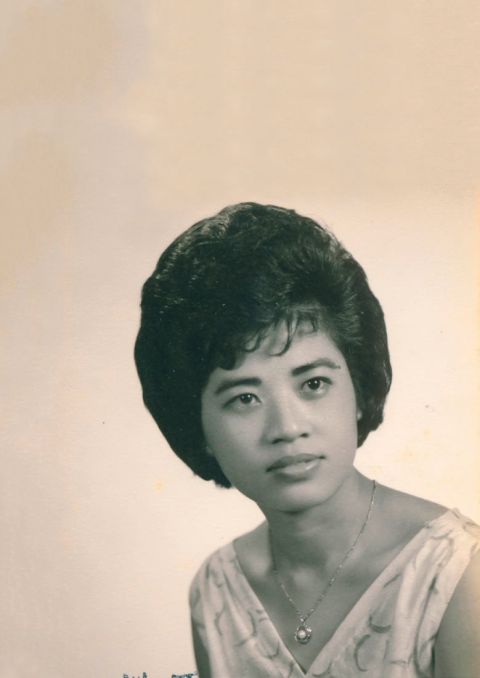
Whether you have just snapped a selfie or landscape, just about any photo can be ‘fixed’ like a pro, even on your phone or tablet. For the purposes of this tutorial, I have chosen to use Adobe Photoshop Fix and an old photograph of my wife’s mother. It was taken many years ago and the print is showing many signs of aging, so I want to bring it back to life and restore it.
When you first open Photoshop Fix you can use the tutorial files to get you started or start a new project by taking an image with the camera, or opening an image from the camera roll, your Creative Cloud files, Lightroom, Facebook or Dropbox.
1. Let’s start with the Adjust tool to get the levels and contrast close to where I want.
I’m going to lift the exposure just a tiny bit by shifting the slider to the right and increase the contrast quite a bit by shifting it more to the right. I’m also going to clean up the background by lifting the highlights. Once happy, I’ll commit to the changes by tapping the tick on the lower right.
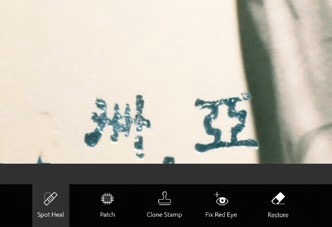
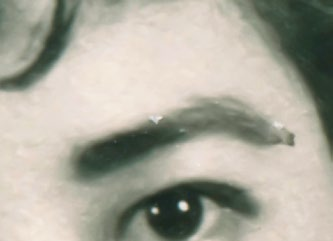
2. Now for the fun bit. There are a lot of scratches on the photo and a stamp at the bottom that I want to get rid of, so I’m going to use the Healing section.
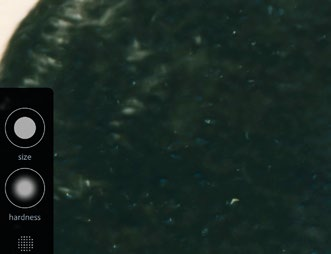
For this image, I think I can get away with just using the Spot healing tool. Some tips for using it – get the size of your brush and hardness right (softer edges are often better to blend the changes in), and zoom your image in to get more control. Let’s start with removing the stamp. Just draw over the bits you want to fix with your finger. If it doesn’t work correctly the first time, touch it some more or undo and try again.
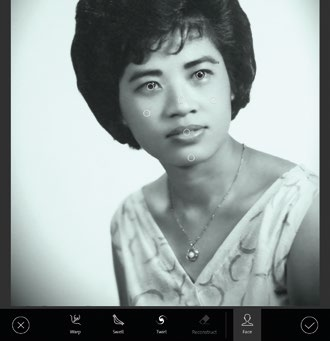
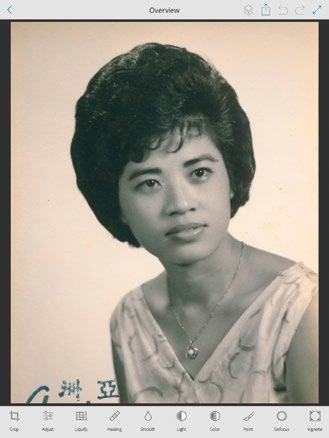
I opened this image from my Creative Cloud files and was presented with 10 tools at the bottom of the screen.Before I start, let’s look at the common controls in each section. You can undo and redo using the buttons at the top right, and view the image full-screen. You can also see “before” and “after” together using the button at the top left, and commit or reject the changes using the cross and tick buttons at the bottom. Zooming in and out using the usual two-finger gestures works too.


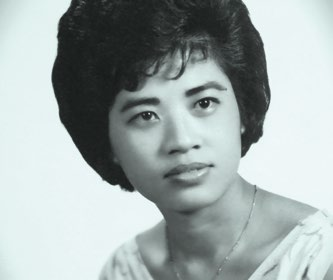
Now for the hair. Zoom in and use little touches for this. Once you finish a section, move the image and keep going. A minute or two and the hair is done. Moving on to the face – there are a number of scratches and a rough patch near the nose. As before, zoom and move. It’s always good to hit the “before” and “after” buttons to see your progress. After removing a few spots from the background, I’m pretty happy with it, so I’ll commit to the changes again.
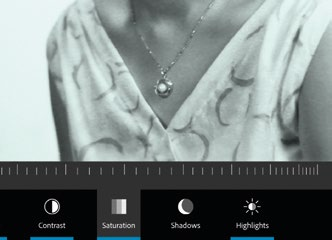
3. Next, I am just going to jump back into Adjust again because I want to make it totally black and white, and remove the old photo sepia tinge.
My background is almost totally white now but it has a few rough spots. I could fix this in a few ways but I’m going to use the Paint tool. Pick the color of the white background, paint over the rough areas, and then commit again.
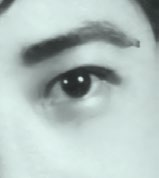
The skin in the old image has become a bit rough so I am going to use the Smooth tool to fix it. This time with a larger brush and gentle strokes.
I have also noticed that the makeup under the left eye looks pretty dark so I will use the Lighten tool to fix it. This step took me four or five times to get it right, undoing each time and hitting the before and after buttons.
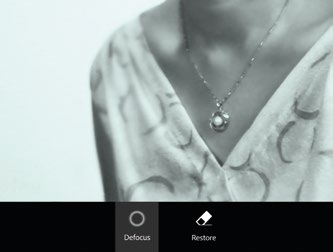
4. Next, I am going to use the Defocus tool to give it a little tighter depth of field by blurring the back shoulder.


Almost done. I’m going to add a subtle vignette to make her pop out a little using the Vignette tool. I can adjust the inner and outer vignette rings and choose a color.
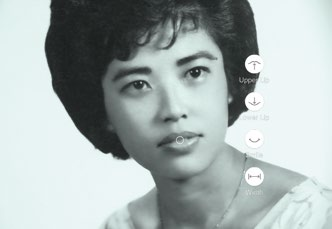
Well, I’m pretty much done except for using the most powerful tool in Photoshop Fix – the Liquify tool. All I can say here is that with great power comes great responsibility, and you should use this with caution! (And maybe don’t use it on your mother-in-law’s photo.) That said, I’m going to throw caution to the wind in order to show you its real power.
The Liquify tool has the usual Photoshop tools of Warp, Swell and Twirl but it also does facial recognition. If I click on the Face button, Photoshop Fix can recognize the mouth, nose, eyes and cheeks, and I can manipulate each one to totally change the face.
5. First, I can make changes to the nose. Then I can adjust the shape of the face and then the eyes. Lastly, I can adjust the mouth, making her look more serious or smile more, the width and even the lip sizes.
I’m not going to commit to these last changes as I think she looked great before, but you can see the power of Photoshop Fix. Think of doing this to a selfie!
Now you can easily post the image to social media or to the desktop version of Photoshop (if you’re a Creative Cloud member), where it non-destructively maintains all the edits to adjust if necessary.