Standing out on social media can be a difficult task. There are just too many people out there with the same type of photos. To get ahead, photographer, YouTuber, and social media influencer Jason Goh (@smashpop) thinks you need to either capture distinctive and rare scenes, or edit your images to a level that is hard to achieve using simple mobile apps.


Standing out on social media can be a difficult task. There are just too many people out there with the same type of photos. To get ahead, photographer, YouTuber, and social media influencer Jason Goh (@smashpop) thinks you need to either capture distinctive and rare scenes, or edit your images to a level that is hard to achieve using simple mobile apps.
Here are his tips on how to capture and edit photos for social media, mainly Instagram. Hopefully, they can help increase your engagement and grow your following!
1st Scenario: TAKING GROUP PHOTOS WITHOUT HELP FROM A 3RD PARTY OR A TRIPOD
There are many instances when you want to take a group photo with your friends but there isn’t anyone around to help you, and no one has a tripod. This tutorial will help you achieve that group shot.
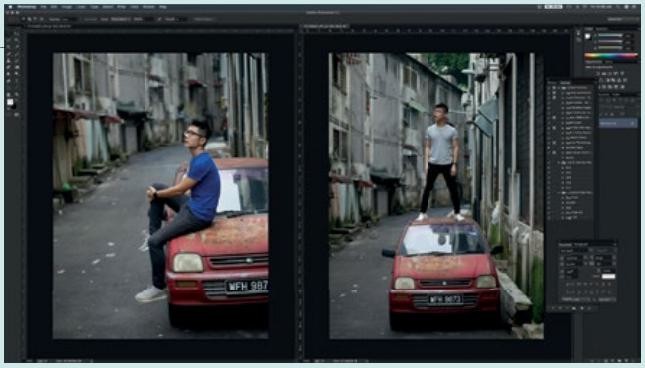
You’ll need to take turns capturing the same scene and angle with your friends, then merge the two photos on Photoshop.
1. ALIGN PERSPECTIVE ON BASE PHOTO
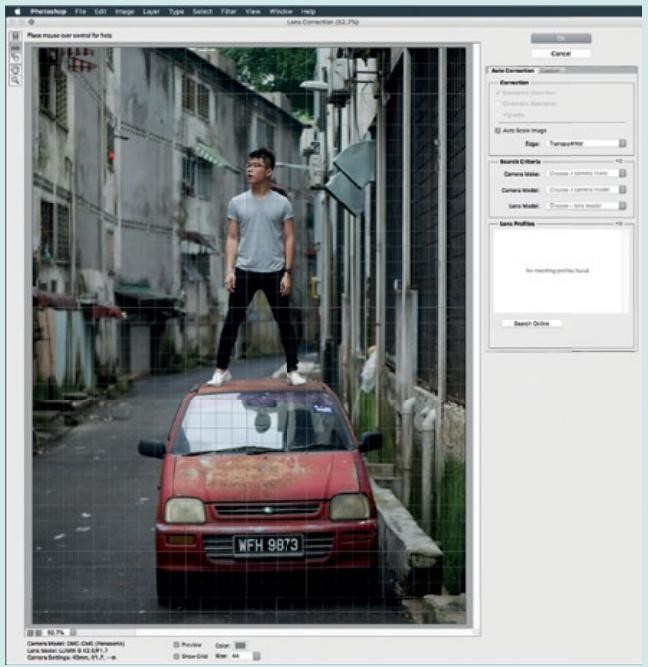
•First, pick one photo to be the base. Then fix its perspective to ensure it is horizontally and vertically aligned by clicking on ‘Filter’, and selecting ‘Lens Correction’.
•Do the same with the photo with the other person, ensuring that both photos are nicely aligned. (This makes it easier to merge the two layers together later.)
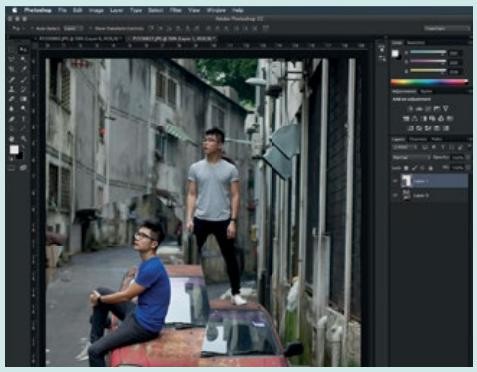
2. CUT OUT AND PASTE THE OBJECT
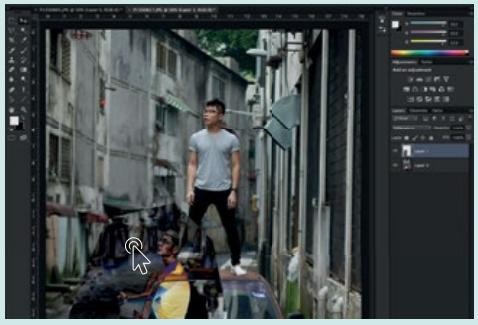
• Cut and paste the first person (Jason) onto the base photo, ensuring that the car and background are perfectly matched in perspective.
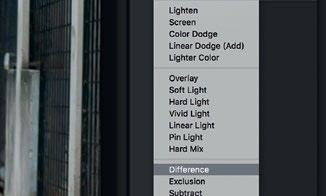
3. SELECT DIFFERENCE TO ALIGN EASIER
• Next, change the ‘Blend’ mode of the top layer to ‘Difference’. This helps to show which parts are aligned and which parts are not, as the parts that are aligned will become dark.
4. USING ARROW KEYS TO MOVE TO ALIGN
• Move the layer around using the keyboard arrow keys until the entire part becomes black, ensuring that the image is properly aligned.
• Next, change the ‘Blend’ mode back to normal.
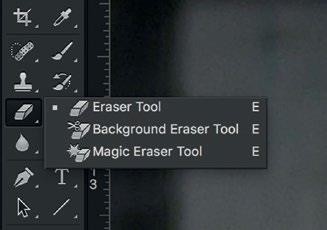
5. USE ERASER TOOL TO REMOVE UNNECESSARY PARTS
• Now, remove the extra parts around the person you just added, so that he looks merged with the base photo.
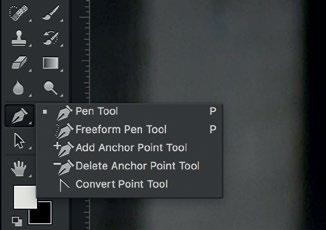
6. USE PEN TOOL TO SELECT AND CREATE CURVED SELECTION
• Use the ‘Pen’ tool to create a selection for areas that are complicated.
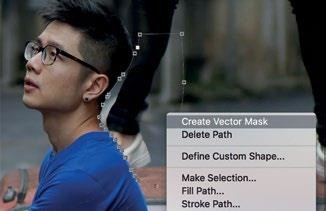
7. SELECT MAKE SELECTION TO TURN IT INTO MARQUEE MODE
• Right click and turn it into a ‘selection’.
• Next, delete that selected area and deselect it by pressing Cmd-D. (Ctrl-D for Windows).
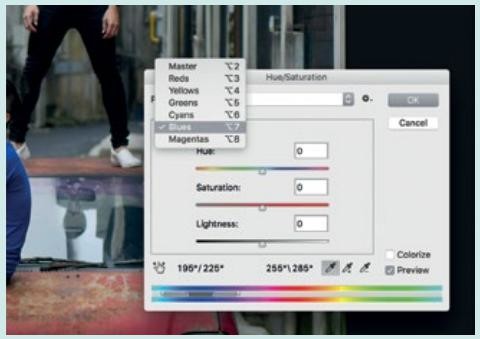
8. TO STANDARDIZE OVERALL COLOR, MUTE THE BLUE
• Now to improve the aesthetics.
• To ensure the overall photo is mostly grey, Jason used the ‘Hue’ and ‘Saturation’ palette and reduced saturation on the Blue channel, turning his T-shirt to grey.
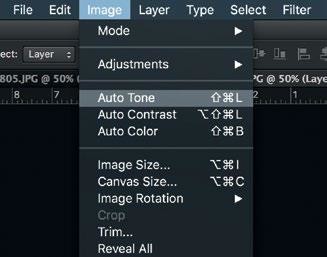
9. QUICK AUTO TONING
• Quickly fix the brightness and contrast by going to ‘Image’, and clicking on ‘Auto Tone’.
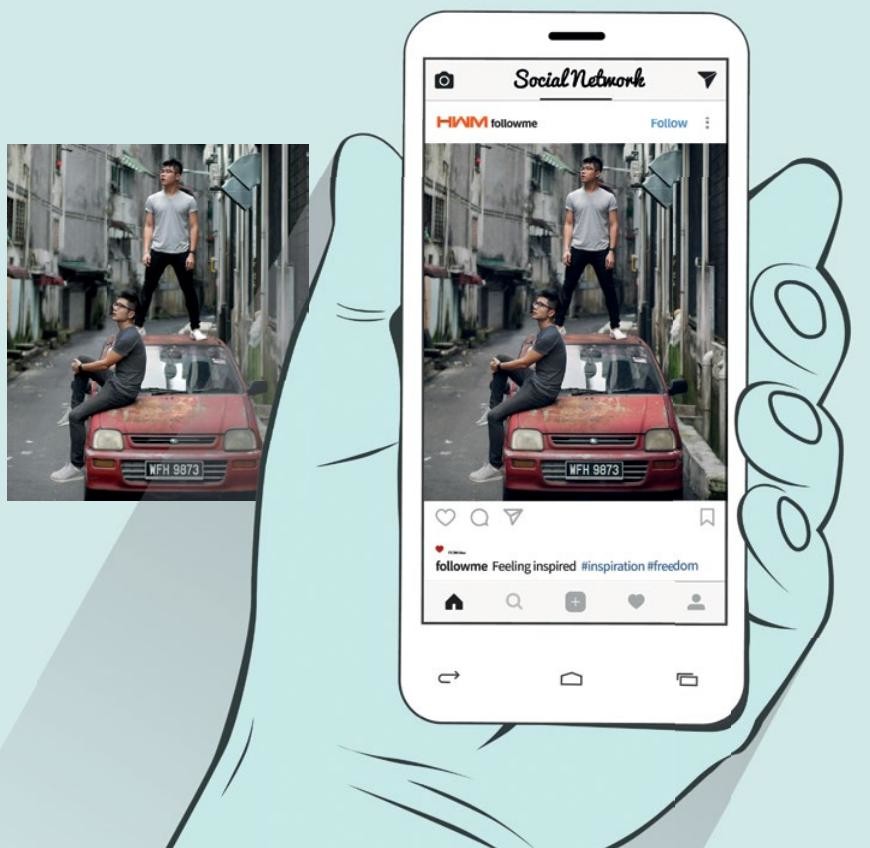
10. BEFORE FILTER
• Now the photo is ready to be transferred to the phone.
• Jason says to always crop photos to a 4:5 ratio if you want to post a rectangle photo on Instagram.
11. FINAL - AFTER FILTER
• Tada! After applying a filter on Snapseed, the photo looks amazing and natural. Time to post this on Instagram.
2nd Scenario: CLEANING UP BACKGROUND
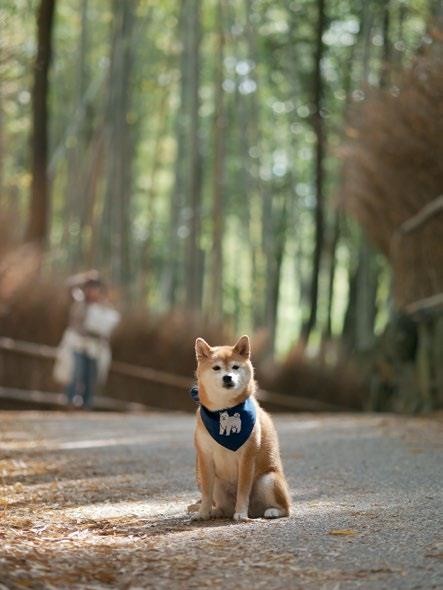
Here, Jason will walk you through the steps to remove a person in the background of this photo, and to create more dramatic lighting.
Jason took this photo at the Arashimaya Bamboo Forest in Kyoto. As you can see, the person in the background distracts us from the main focus of the photo, so Jason is going to remove him.
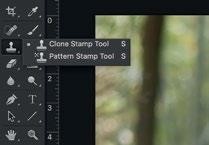
1.USE CLONE STAMP TOOL TO REMOVE HUMAN IN BACKGROUND
• First, switch to the ‘Clone’ stamp. Then press and hold the ‘ALT’ key on the keyboard to pick a source from which you will sample parts of the background to clone with.
• Then, release the ‘ALT’ key and start stamping to replace the human form with copies of the surrounding area.
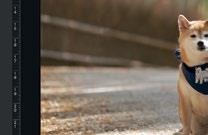
2. DONE REMOVING
• This is how the background looks like after removing the human.
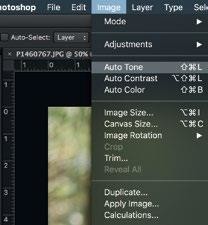
3. QUICK FIXING THE BRIGHTNESS AND CONTRAST
• As with before, fix the overall brightness and contrast by going to ‘Image’, and selecting ‘Auto Tone’.

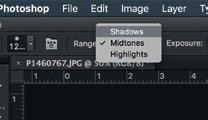
4. SWITCH TO BURN TOOL TO DARKEN THE SHADOWS ON THE ROAD
• To create a more dramatic feel to the photo, Jason decided to darken the shadows on the road around the dog by using the ‘Burn’ tool and painting on the existing shadows, making them look darker.
5. DODGE TOOL TO INCREASE SHADOW ON THE DOG
• To ensure that the dog is nicely lit, Jason then used the ‘Dodge’ tool to paint over the shadows under its paws and in between its legs, brightening them slightly.
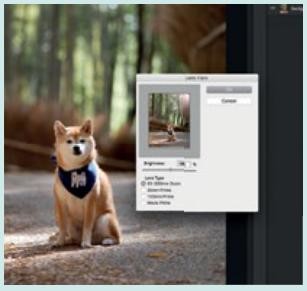
6. ADD LENS FLARE TO SIMULATE SUN FLARE
• To make the photo look more surreal, Jason added a flare to the top right of the photo to simulate the sun’s rays by going to ‘Filter’, clicking on ‘Render’, then selecting ‘Lens Flare’.
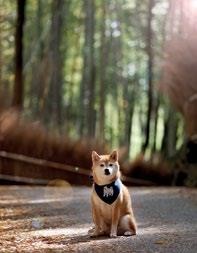
7. BEFORE FILTER
• Crop it to a 4:5 ratio and it’s now ready to be sent to the phone to add your filter of choice.

7. FINAL - AFTER FILTER
• Done! Now you can post it on Instagram and wait for the Likes to come your way :)
Tips and images by Jason Goh
Edited by Marcus Wong
ILLUSTRATION 123RF