DOUBLE EXPOSURE PHOTOGRAPHY

Rames Harikrishnasamy (@ramesstudios), self-taught imaginary Photoshop artist and Adobe creative influencer based in Malaysia, shares how he tells stories through surreal and fantasy-like images by creatively merging images together.

Portrait of Tammy Strobel
Rames Harikrishnasamy (@ramesstudios), self-taught imaginary Photoshop artist and Adobe creative influencer based in Malaysia, shares how he tells stories through surreal and fantasy-like images by creatively merging images together.
 
My Reading Room

Images by Rames Harikrishnasamy

Text edited by Marcus Wong

Double exposure photography has become a popular trend among photographers and designers. Traditionally created on camera by tripping the shutter more than once to expose the film multiple times to different images, double exposure effects can also be easily recreated on Adobe Photoshop.
 
My Reading Room
My Reading Room
STEP 1

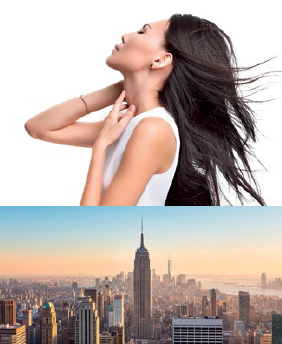
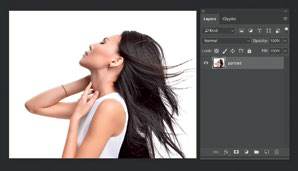
Import the main image into Photoshop. Rames is using a photo of a lady with her hair flying downloaded from Adobe Stock, but he says you can use any image you like. For best results, pick one with a clean background so you don’t get other images clashing with it

Let’s name this layer “portrait”.
 
My Reading Room
STEP 2

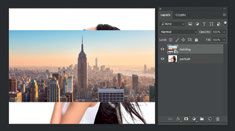
Once you’ve imported the image, add in the second image. For this tutorial, Rames is using an image of a city with high rise building.

Drag the second image onto the layer of the lady and name it “building”. Your layers would look a little messy now, but it’s ok.
 
My Reading Room
STEP 3
Now rotate the image of the building vertically to scale and align it with the lady’s flying hair by pressing COMMAND-T for Mac (Control-T for Windows). Press ENTER once you’re done.
 
My Reading Room
My Reading Room
STEP 4
This is when the “magic” happens. Make sure your building layer is still selected and move your cursor towards the layer blending mode dropdown as indicated in Image 4.
My Reading Room
STEP 5

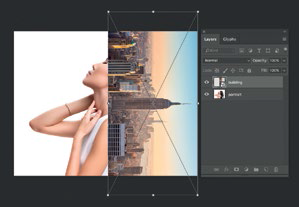
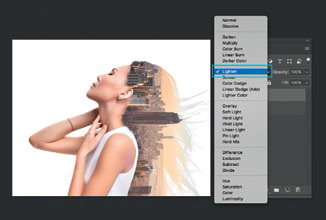
From the dropdown, select LIGHTEN blending mode.

Once done, you’ll notice that the images of the buildings seem to have merged with the hair of the lady.
My Reading Room
STEP 6

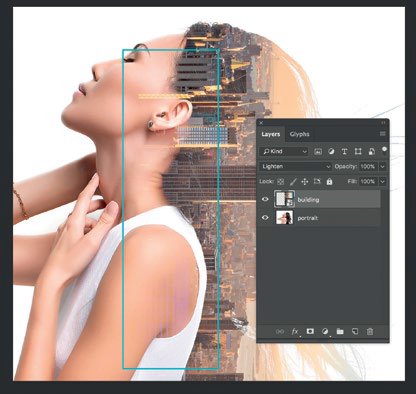
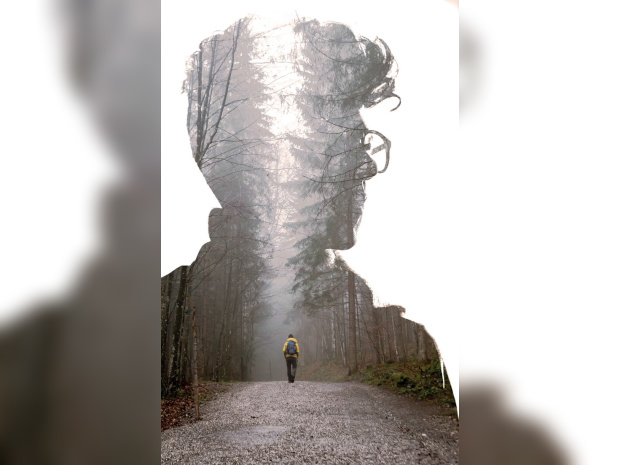
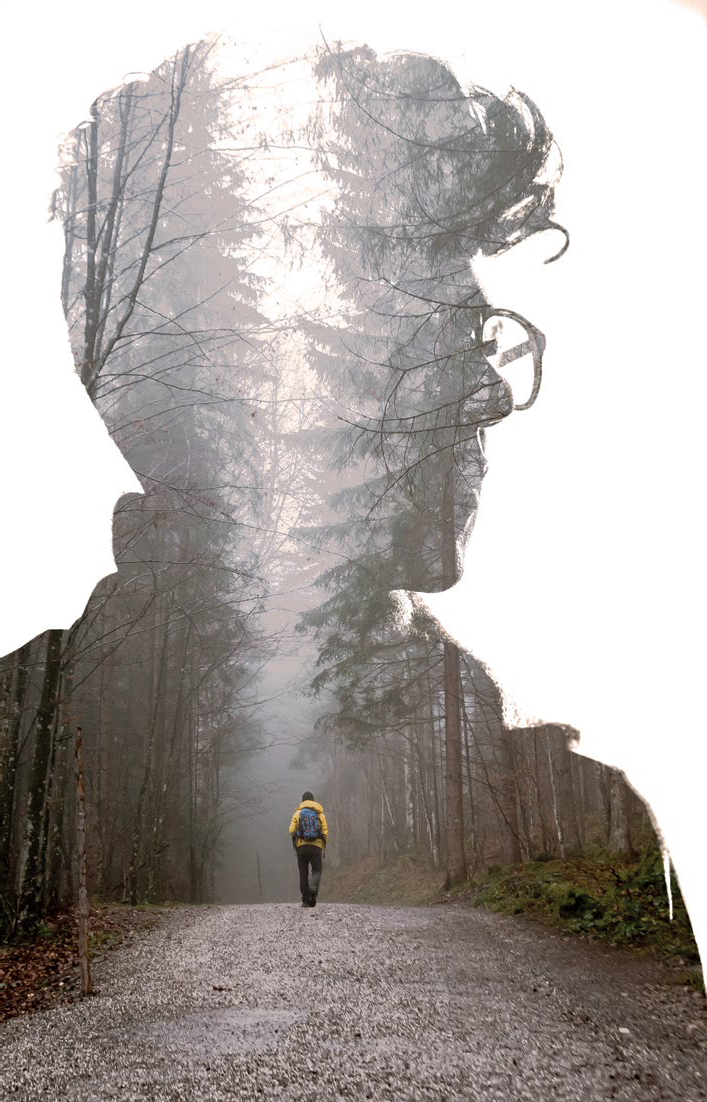
It’s amazing how the “dark” area of the hair is now filled with the building but we’re not done yet. If you look closely, the building image covers some parts of her face and arm. This requires us to do some clean up.

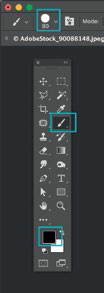
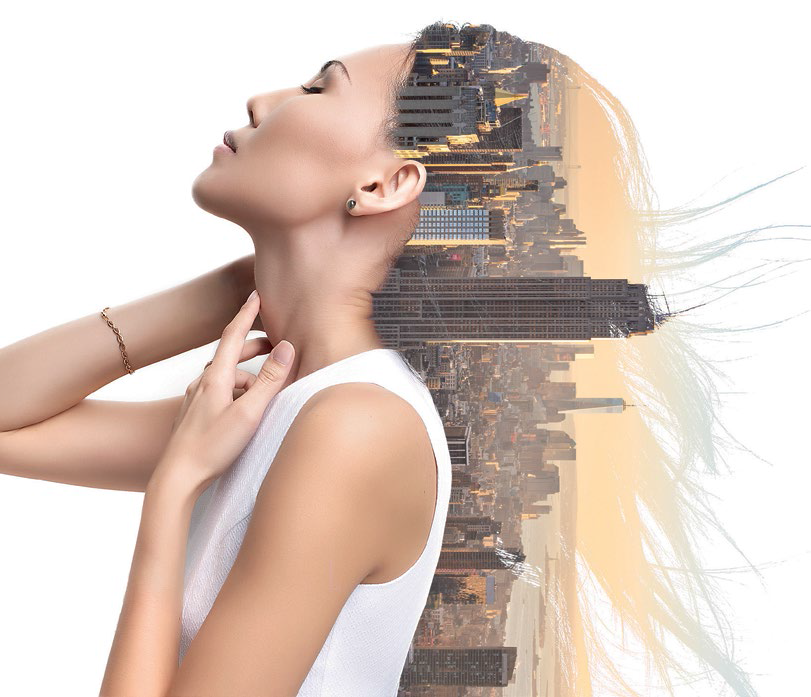
Select building layer and click on the add layer mask located at the bottom part of the layer panel.

From the toolbar, choose the brush tool and pick black as your color. You’ll want a round brush with hardness of 100% for precise adjustments.
 
My Reading Room
STEP 7

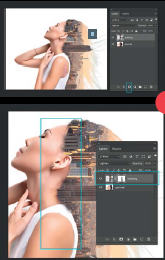
Start removing the unwanted the part of the building that is overlapping her face and hand by painting over them with the mask selected. (The white box linked to the image) If you accidentally remove too much, just paint over the area in white to bring the image back.

This double exposure tecnique can be used with one, two, or more images. You can also try the different types of blending modes available in Photoshop through the layer dropdown menu. Each will have its own unique effect.

Give it a try now and explore the infinite possibilities with Adobe Photoshop.
 
My Reading Room
You can also try making the mask by selecting the portrait layer and picking just the lady’s hair using the Magic wand tool or the select Color range tool, then jumping back to the building layer to create a mask with that selection.