

Adobe’s latest drawing app–Fresco– offers you an incredible range of drawing and painting tools right on your iPad, but how to get started? Here is a little tutorial courtesy of Michael Ng(@mindflyer) on how to render your design in Adobe Fresco.


Adobe’s latest drawing app–Fresco– offers you an incredible range of drawing and painting tools right on your iPad, but how to get started? Here is a little tutorial courtesy of Michael Ng(@mindflyer) on how to render your design in Adobe Fresco.
ADOBE FRESCO DESIGN RENDER TUTORIAL
What you’ll need:
An iPad with Adobe Fresco installed, and an Apple Pencil.
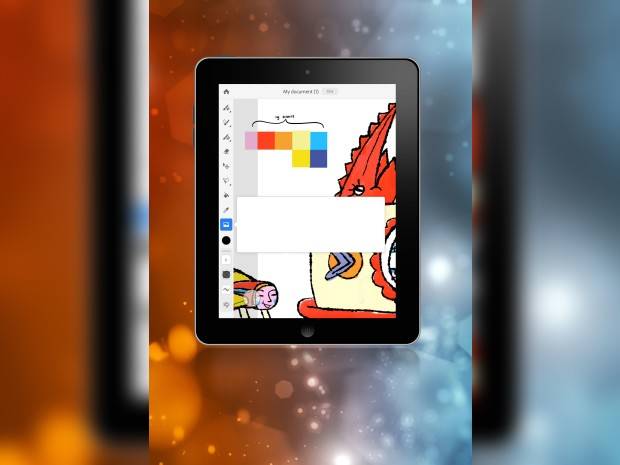
A sketch of your own design. For this tutorial, we’ll be working on my own lobster design.
Using an iPad and an Apple Pencil, the large range of drawing apps on the App Store and its incredible portability factor, the drawing experience can become very addictive. You can pick a tablet that best suits your workflow and budget - either with a top-of-the-line iPad Pro like me, or if portability is your priority, even an iPad mini is a great option to travel and draw with.
Now let’s get started.
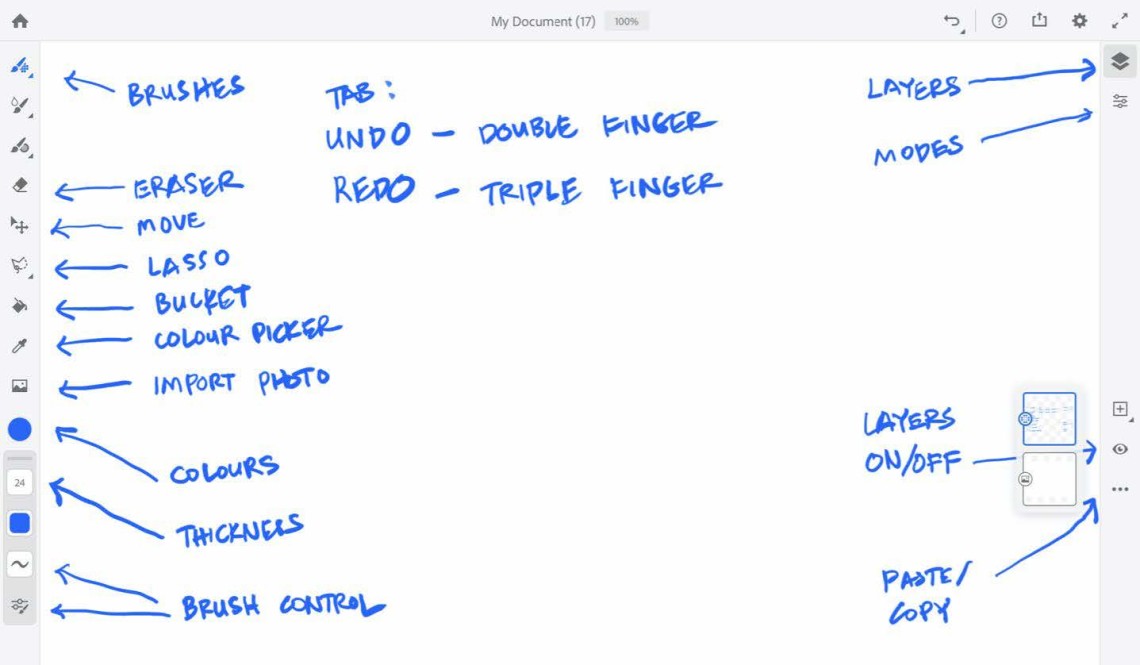
If you frequently use drawing programs, the Fresco interface should be quite familiar. The main differences here are the three categories of drawing brushes: Pixel brushes, Live brushes and Vector brushes.
(You can find more info here: https://helpx.adobe.com/sea/fresco /how-to/intro-to-fresco.html)
What you’ll be working with:
1 Photo import tool
2 brushes tool
3 Colours tool
4 Layers tool - modes/options even though adobe fresco is powerful and can support hundreds of layers, it’s always good practice to use your layers sparingly and wisely so that your files don’t end up being unnecessarily large and unweidly.
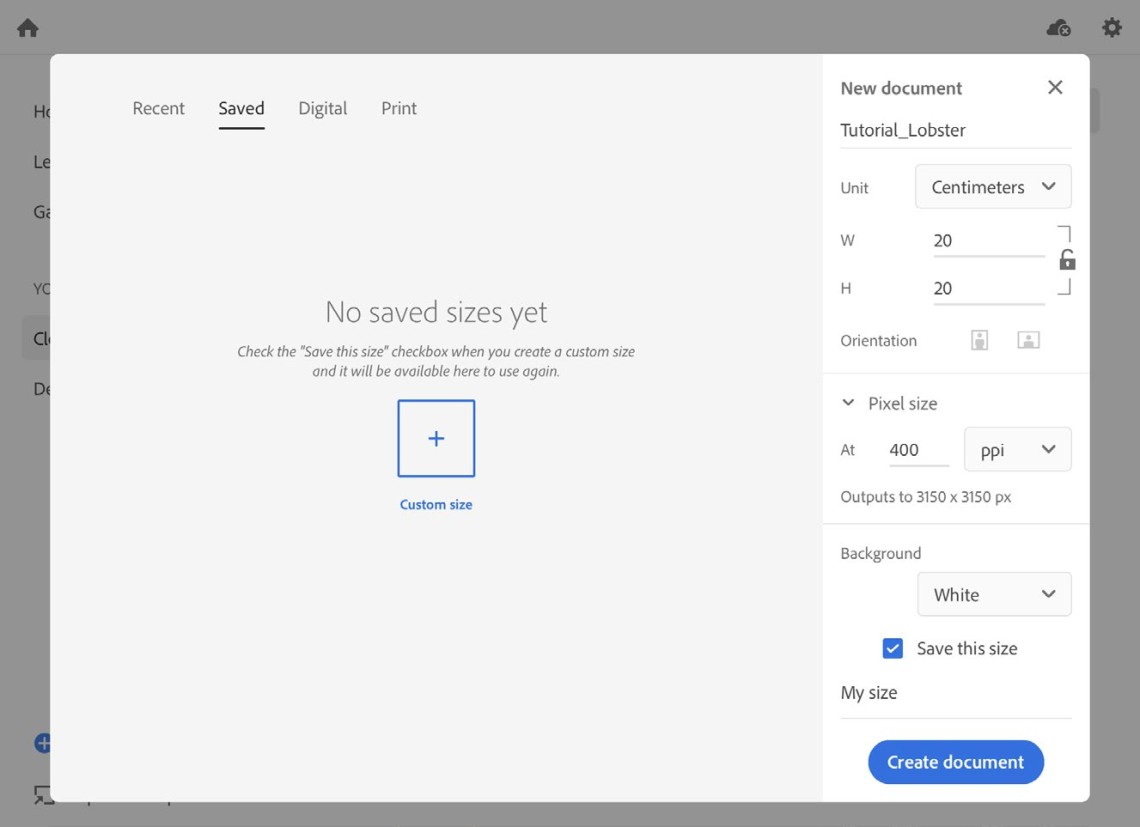
STEP 1 Create a new document
Set up a new square document 20cm x 20cm at 400 dpi (I prefer working at a3 size at 400 dpi or bigger whenever possible).
PRO TIP: For all aspiring artists and illustrators, always ensure your artwork is created at a decent printable size, even if you’re just planning to post it for web. You’ll never know if somebody may be interested to buy a print from you.
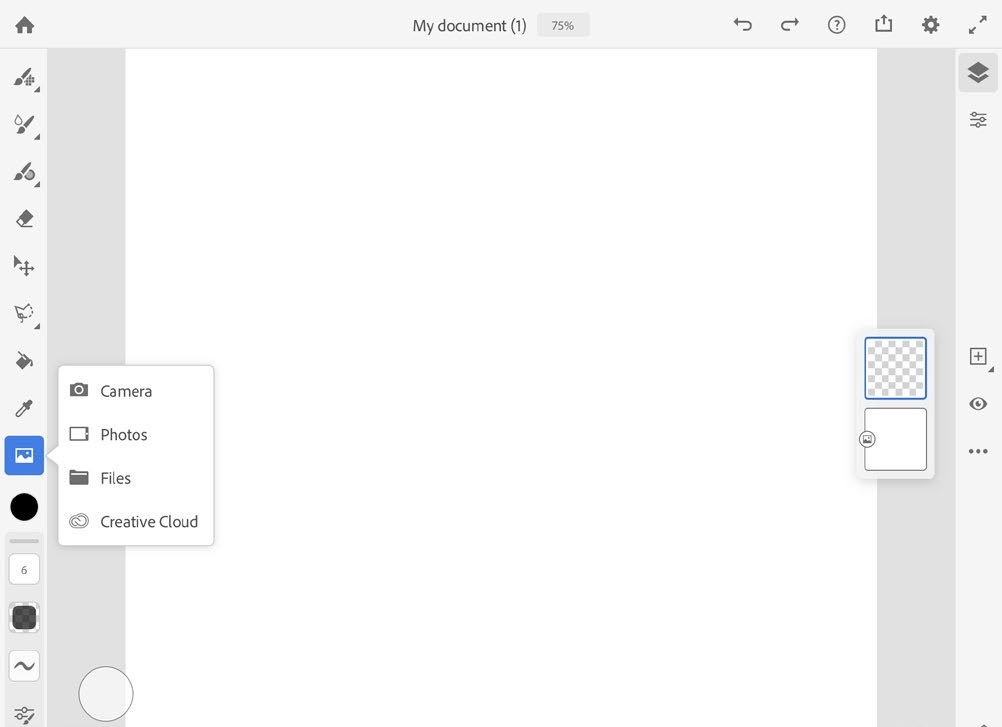
STEP 2 Import Your Sketch
Click the Picture icon (the icon looks like a picture frame) to import a sketch file of your choosing.
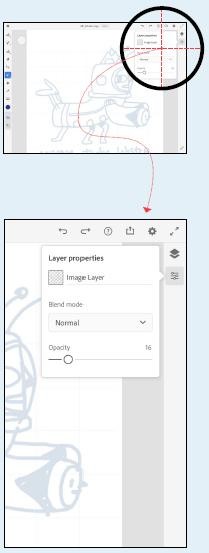
STEP 3 Work With Your Layers
Select the imported layer, open Layer properties and set its opacity to anywhere between 20% to 40%. Lock this later when completed.
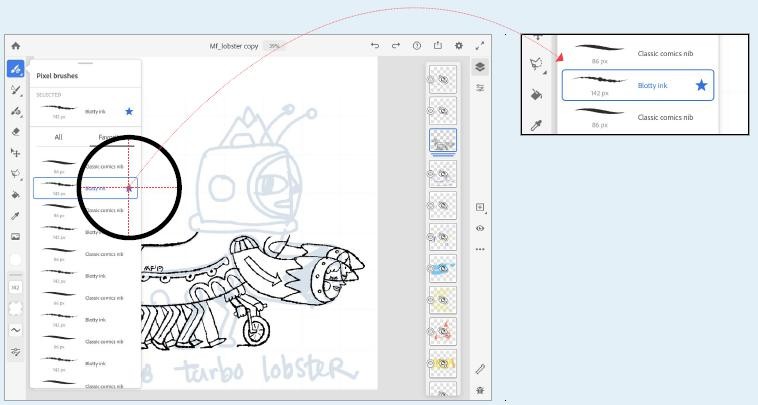
STEP 4 Start Tracing
Create a new layer and rename it. I am using my favourite blotty ink brush to trace the outline. Set the thickness to about size 85. You should make use of this moment to improve on the design through tracing. Once you’re done, lock this layer.
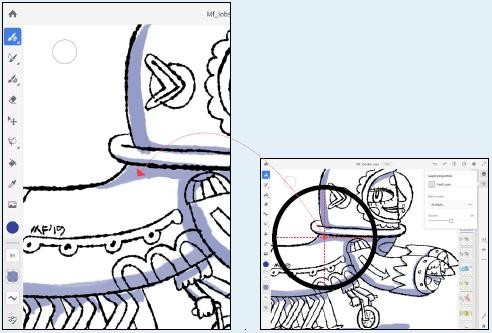
STEP 5 Add Shadows
Adding shadows is really fun! I enjoy this step the most - it makes the design pop and makes me feel like I’m breathing life into my drawings. I add my shadow layer below the main line-work layer.
Feel free to decide which angle the light is coming from. I sometimes like to add a directional arrow mark on this layer to remind myself where the light source is coming from so I stay consistent when painting on these shadows.
I avoid using black for shadows as I find it dulls the illustration - instead I will pick my favourite shade of dark blue, set the layer opacity to about 50%, and set the blend mode to multiply using the Layer properties menu. Pick a good flat colour brush from the basic brush set, like the “hard round variable” brush, for this layer.
Once all the shadows are filled in, erase your directional arrow mark and lock this layer.

STEP 6 Add Colours
The next part of the process is to colour in your design. Pick or create a colour set that matches your drawing, then paint it on a separate layer for quick and easy reference so that you will not stray from the colour combination you’ve identified.
For this stage, you can do any of the following:
— Trace the border with the same flat bush and fill in colours quickly using the bucket tool.
— Paint in all your colour shapes stroke by stroke with a textured brush from the Painting brush set.
— Blend Paint in all the colour shapes stroke by stroke with a Live Brush.
STEP 7 Finalise Details
Once all the colours are in, I will tighten up the whole illustration by adding details and clean up or improve line-work where necessary. I try not to overwork the design - the artwork is more interesting especially when you make a couple of “accidents ”.
STEP 8 Export And Share
You can now export your masterpiece as a PNG for sharing to your social media content. If you choose to work on your artwork further on your desktop, you can export the file as a PSD and work on it in Photoshop. There’s even an option now to export a timelapse movie of your creation!
Finally, sign off and remember to share your masterpiece! It’s never too late to post and share your work but remember to:
1 always credit your sources and share your inspiration where you can.
2 Never get too hung up on creating the “perfect” artwork because we should always be striving to grow and improve no matter what.
Have fun!
Images by Michael Ng
Edited by Marcus Wong


